- Tuesday 09 August 2022
- 0 Comments
Whether you’re new to planting bulbs, you’ve tried and failed to get bulbs to grow before or you’re a seasoned pro looking for a refresher, our complete guide to bulb planting will give you everything you need for a beautiful display of flowers.
Preparing For Bulb Planting
Before you get your gardening gloves on, for successful bulb planting you need to do a little pre-planning. Don’t worry, it’s simple and won’t take more than a few minutes.
Choosing The Right Bulbs For Bulb Planting
Not all bulbs are created equal. The first thing you need to know is that there are two main groups of bulbs.
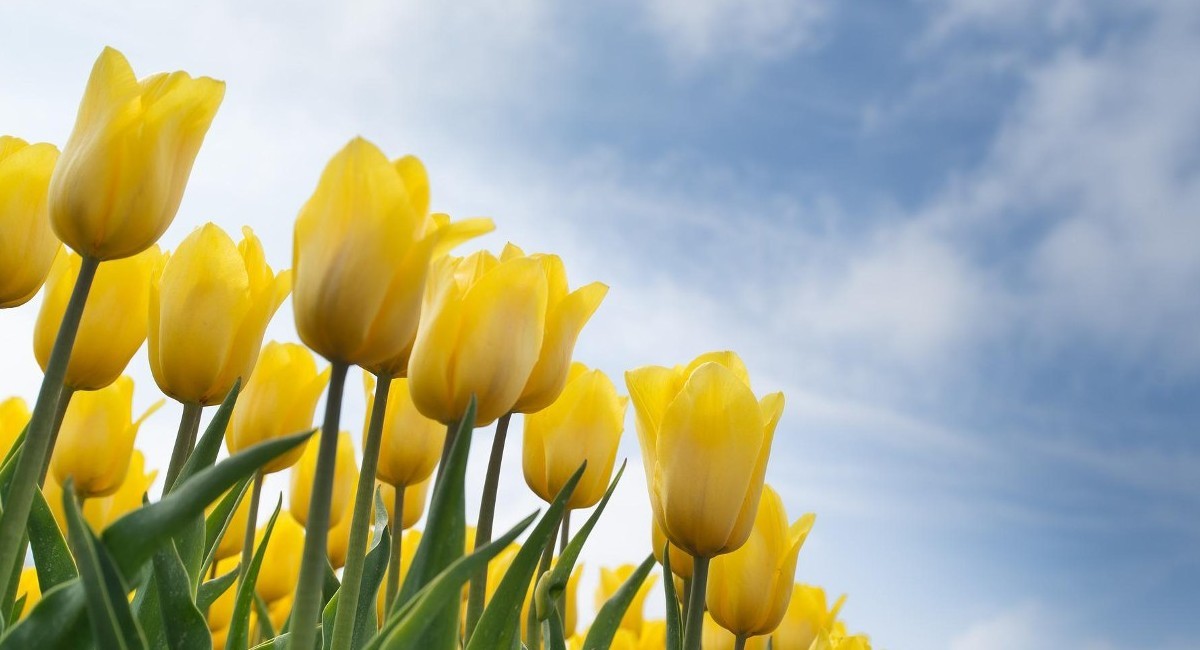
Spring bulbs, such as tulips, irises, daffodils, hyacinth, allium and crocus, are planted in the autumn once the ground is cooler and spend the winter sleeping peacefully, ready to grow and flower in the spring. Because they’re called spring bulbs, newcomers to bulb planting often think that’s when you need to plant them. This is a really easy mistake to make due to the confusing naming. But in fact, they actually need a few weeks of cold weather during the winter to activate them ready to grow. Spring bulbs should be planted in September and October, although you can plant tulips in November too.
Summer bulbs, like gladioli, lilies and dahlias, are vulnerable to cold and therefore are planted in the spring (April and May) to flower in the summer. Confusing right? You’ll also want to make sure that the bulbs you buy are good quality. They should be firm to the touch and free from any signs of mould, rot or disease. Bulbs should be planted in the same season they are bought, they won’t keep until next year.
Choosing The Right Location For Bulb Planting
Once you’ve identified what bulbs you want to plant and therefore when you’ll need to plant them, you then need to think about where you’re going to situate them. If you’re lucky enough to have a garden, most bulbs do well in sunlit areas with good drainage. If it’s too soggy your bulbs may rot in the ground before they get the chance to grow. If you have heavy clay soil in your garden that holds water, you will need to dig in some compost, well rotted manure or shredded leaves and ideally some horticultural grit to your planting site before you start to help with drainage.
There are some bulbs that will thrive in the shade though, so if you want to brighten up shady corners, choose woodland bulbs like snowdrops, bluebells, cyclamen and anemones. No garden? No problem. Bulbs grow just as well in containers. Simply grab yourself any container with holes in the bottom for drainage, fill it with compost and you’re ready to go.
Planning Your Bulb Planting Scheme
If you’re going for maximum impact with your display of flowers, it can be worth spending a few more minutes planning out your bulb planting scheme. Bulbs look their best when planted in clusters, so plan for at least 6-7 bulbs together in the same area.
Different bulbs flower at different heights, so for bulbs that flower at the same time, you want to plant the tallest at the back and scale down to the shortest at the front so they can all be seen. Most packs have the plant's height on it, but this information is also easy to find online. The other thing to consider is mixing bulbs that flower at different times in the same location. This will mean you get to enjoy lovely displays of colour over an extended period as one flowering bulb takes over from another that has finished.
Bulb Planting Techniques
Bulb Planting Basics
.jpg)
- If you’re planting in a garden bed or border, weed the area before you begin. Handy garden tools such as a leaf blower or strimmer can be useful for taming overgrown areas and clearing the ground before you begin. If you’re planting in a lawn, you may want to treat the grass with lawn feed first. Containers just need fresh compost of the right depth to give you at least 3 inches below the bulbs and the right number of inches above and then you’re ready to go.
- Dig a hole with a trowel, or alternatively a specialised bulb planter can make the job easier. This is usually 2-3 times the height of the bulb you’re planting, but check the packet and it’ll tell you the ideal depth for that type of bulb. If you dig the hole too deep the bulb may not grow.
- Place the bulb in the hole ensuring that the bulbous bottom end faces down and the pointy top faces up. Make sure you space the bulbs at least twice the bulb’s width apart so the plant has room to grow. The exception here is daffodils that will thrive if planted in clumps and provide a lovely display.
- Fill the hole back in and lightly firm down the soil. If you’re planting spring bulbs in the autumn, the soil is usually moist, so there’s no need to water your bulbs in. If you’re planting summer bulbs in late spring and the soil has dried out, water the bulbs after planting. Bulbs in containers need watering once when first planted, then not again until they start to grow.
An Advanced Bulb Planting Technique
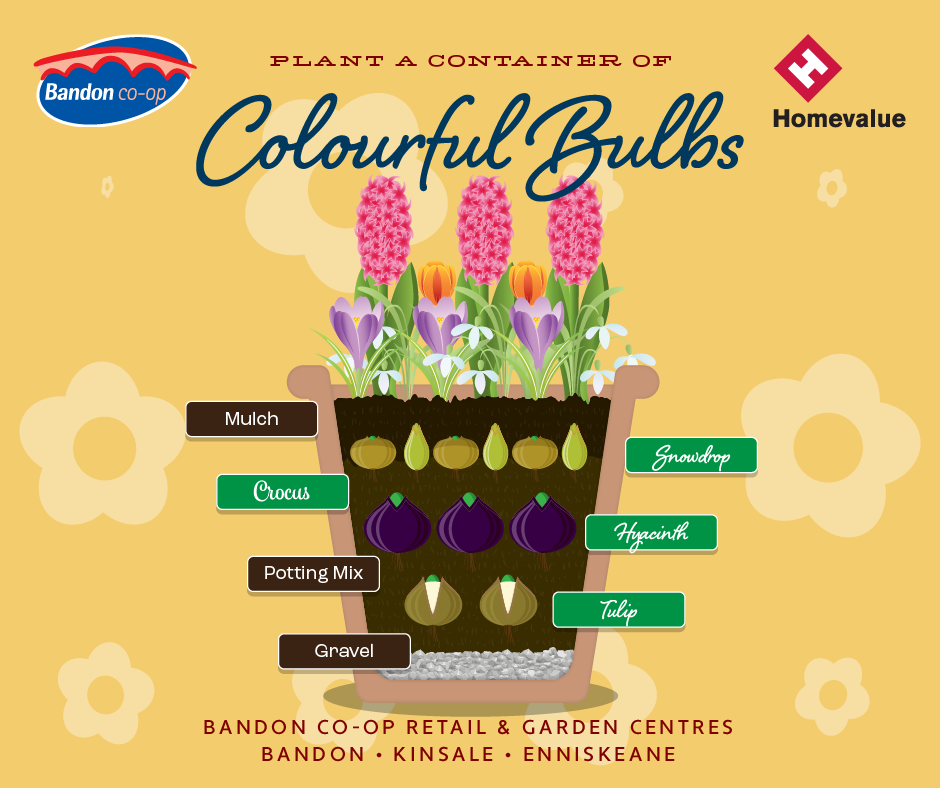
If you’re feeling confident and want to try something special, you might want to try layering your bulb planting, sometimes called lasagne planting. With this approach, you layer bulbs that flower at different depths in the same small space to provide a continuous display of colour in the same spot. Typically used when planting bulbs in containers, this can also be helpful in small gardens where space is at a premium.
- First, organise your bulbs in order of size, large to small. The largest bulbs will need to be planted deepest, so these go first, all the way to the smallest which are planted the most shallowly.
- Then, either add your base layer of compost to your container or dig down to the depth you’ll need for the largest bulb.
- Place your largest bulbs in the planting area and cover with soil up to the depth you need for the bottom of the next size of bulb. Don’t worry if you don’t completely cover a layer before you add more bulbs, they’ll all have a roof over their head eventually. Make sure bulbs don’t touch and those on the same layer are at least a bulb’s width apart.
- Repeat this process, adding layers until all your bulbs are planted and your container is full, or your soil surface is back level with the rest of the garden.
Bulb Planting Indoors
If you fancy a splash of winter colour, you can do what’s referred to as forcing bulbs indoors. Now this sounds brutal and cruel, but trust us, the plants won’t mind a bit. You’ll need to start in early September with most bulbs for this technique.
- Plant your bulbs in attractive planters with drainage holes, in the same way you would outdoor containers. If your pot doesn’t have drainage holes you’ll need to add specialist bulb fibre to the bottom of the pot.
- If you’re only doing one pot, you might pop your bulbs in the fridge in a paper bag. This sounds weird, but it’ll trick the bulbs into thinking it’s winter. This only works if you don’t store fruit and veg in your fridge as they can emit gas that kills the bulbs. If you have a large container or several, a chilly garage or outbuilding covered in a bin bag or in a box works well. Most bulbs need at least 10-15 weeks in the cool and dark, but daffodils are fine after 6 if you’re in a hurry.
- When the time is up, bring them indoors into a room that’s not too warm and has some indirect sunlight. When they start to grow you can move them to a warmer room and more direct sunlight to flower. Water whenever the compost gets dry and enjoy gorgeous colour in the gloomy winter months.
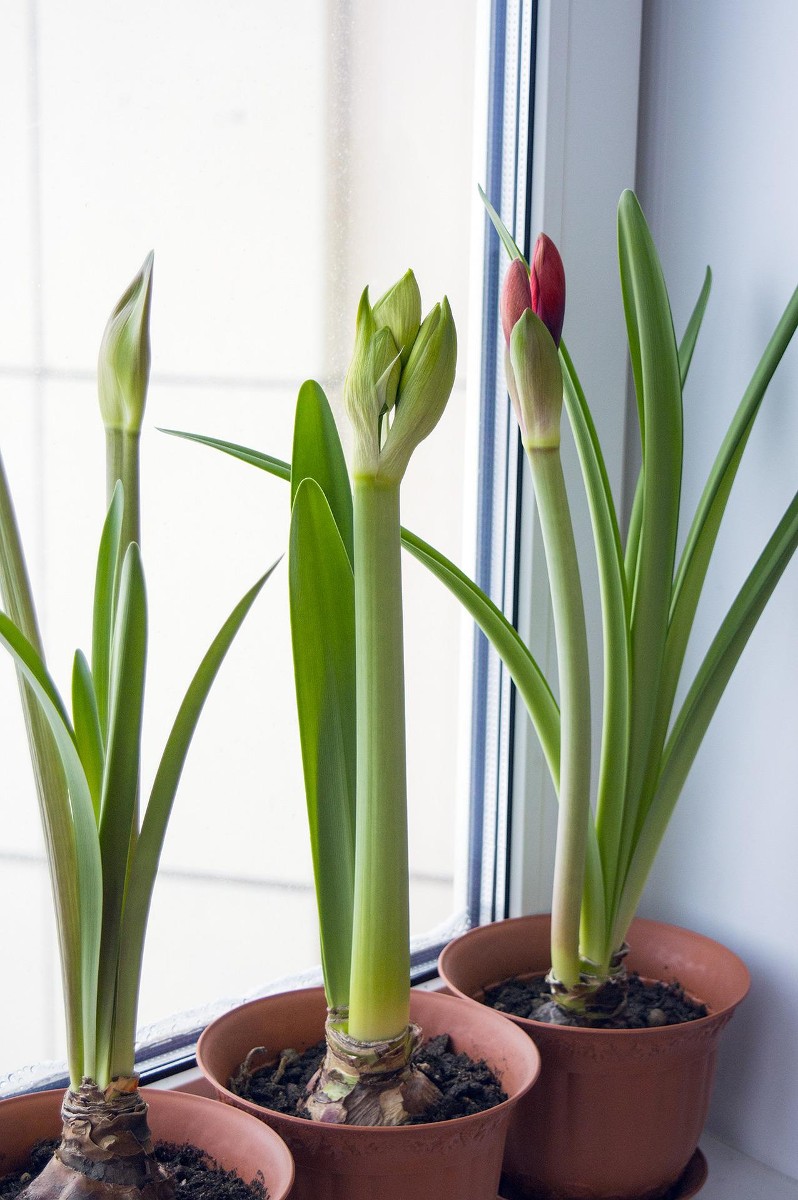
One thing to note is that there are some tropical bulbs that only grow indoors such as amaryllis and paperwhites. These don’t need the chilling process as they never get cold in their native environment. Just soak the roots in lukewarm water for 3 hours, pop them into a well drained pot of compost a third of the way up the bulb, water and leave in a warm sunny spot for the magic to happen.
Keeping Your Bulbs Beautiful After Planting
One of the joys of bulbs is that they flower year after year if treated right. Spring bulbs in particular can actually multiply underground, getting more and more beautiful as time goes on. Here are a few tips to preserve your hard work.
- When flowering has finished, don’t cut back the plant’s foliage until it goes yellow and dies back of its own accord. The green foliage is gathering food for the plant to see it through the winter months.
- Spring bulbs can be left in situ wherever they’re planted, but tender summer bulbs can need digging up and storing in aerated paper or mesh bags in a cool but not freezing, dry and dark place over winter. If you don’t have these bags, a cardboard box with holes will do the job.
- If your successful bulb planting has renewed your love of gardening, you may want to mark where your bulbs are after you’ve cut back the foliage so you don’t accidentally damage them when planting other things.
Shop our FIVER Gardening sale now where Tulip and Daffodil bulbs are only €5
